As you may remember from the previous article I have changed, using open-source tools and with a minimal financial cost, an ordinary lightning into SMART lightning in my home. When I saw how many benefits I got out of it, I decided it wouldn’t be the last thing I did.
In this text I will focus on turning a not-yet-smart device into a smart one! I’ll take care of the device that at my place has been on non-stop for several months and I can’t imagine not having it. The 4-in-1 sterilizer! If you are a parent, you know what I am writing about 😀
From this article you will learn i.e.:
- why I wanted o change a sterilizer into a smart device
- what I need to have a smart device
- what element turns an ordinary device into a smart one
- how integration between apps works
- what is the power consumption in time
- about the algorithm
- about the sterilization operation algorithm and sending a notification to the phone
Before I move on, I will reveal what I’ve changed in my home since the last article to make it smarter. Well, the bathroom fan turns on/off depending on the humidity (here I relied on the deviation and delta from recent measurements), I control the humidifier via my phone (I did reverse engineering), and the washing machine tells me when the laundry is done.
Every modification mentioned could be easily described in a separate article. With each one I had a lot of problems: from writing a correct algorithm, to readings and bypassing interference from devices.
All of them involved many emotions: from frustration to excitement. If you want me to share my adventures – leave a comment and write, what interests you 😊
Why did I want to change a sterilizer into a smart device?
With an infant, a person is task-oriented. As they complete all the tasks, they want a peace of mind and the right amount of sleep. And if they forget something – this harmony is disturbed. That’s why, if I can, I use automation to make my life easier and take advantage of the devices I have. I own a Neno 4-in-1 sterilizer.
Mainly I use 3 functions:
- heating up milk/food
- defrosting food
- sterilization.
And while I don’t forget about the heating, I ALWAYS forget about the end of the sterilization, and I have to sterilize the same thing again, which results in going to bed at 11.30 p.m. or later, not at 10.00 p.m. 😉 I thought that I always have my phone with me, so it would be useful if notifications regarding the end of sterilization were sent from the device to my phone. How much time I could save with it!
And that was my first goal – sending a notification from the device to my phone.
Spoiler alert: as of the date of writing this article, I can already control the sterilizer by phone (both as a separate module and from the level of notifications), which required hardware change. However, I will focus on one functionality here.
What do I need to have a smart device?
To turn this device into a smart one, you have to change the hardware or add a physical component that will monitor the device’s operation and send information. As I wanted to do it well, quickly and cheaply, I have chosen the second solution.
Changes that needed to happen:
- purchase of a device, which can monitor the power consumed by the target device and send data,
- proper integration of the device and the app, so that I have access to the data,
- understanding the logs, to see what is being sen from the monitoring device,
- Creation of an algorithm responsible for sending the notifications to the phone.
As you already know from the previous article, I am mostly interested in the Zigbee protocol, and I use 4 apps to control the Smart Home:
- HomeAssistant,
- Node-RED,
- Zigbee2MQTT,
- Mosquito.
An element that turns ordinary devices into smart ones
Let’s begin with the first point. There are various solutions available on the market, but the simplest is to buy a socket-plug. For me, the choice was: a Zigbee 16A plug from the company RTX.
There are plugs on the market that have both WiFi and Zigbee connection, but I am only interested in the Zigbee protocol. Additionally, at the time of the purchase, the price was 49 PLN.
Integration with apps
The integration with the sterilizer is easy – you simply put the plug between the socket and the device. In order for the data to be visible in the app, you need to properly configure the Zigbee2MQTT with the socket.
By looking at the logs in Zigbee2MqTT, I could see what information is being sent and which of it I can use to accomplish my goal.

For me, the most important information is located below the power parameter. It is the amount of electric energy used in a given moment [expressed in watts]. After the configuration, the plug connected to the sterilizer should be visible both in the HomeAssistant app and in Node-RED.
So, it is time to see how the sterilizer behaves in two modes:
Analysis of the power consumption by the device, that is how much power the device draws
You can check the power consumption either in individual logs in Zigbee2MQTT or in the history of the HomeAssistant app, where you will find a chart. I have chosen the chart. Entering the device history and selecting a specified time frame, I checked the operation characteristics of the sterilizer. The vertical axis indicates the amount of electricity [W], the horizontal axis the hour.

What was happening during these time frames? I turned on the device only at about 6.20 p.m., so the water in it was in a room temperature. Then, I turned on the food heating function. I didn’t turn off the sterilizer after taking out the bottle, and around 8.40 p.m. I began sterilizing the bottles.
To sum up: between 6.20 p.m. and 2.00 a.m. 2 functions were used:
- heating/maintaining the water at 40 degrees C,
- sterilization, where water is heated to 100 degrees C, and then maintained at this temperature for 10 minutes.
Can you guess which bar is responsible for what? Let’s take a closer look.
Heating
In the chart between 6.20 p.m. and 6.40 p.m., you can see that when you turn on the device, in which the water temperature is less than 40 degrees C, the water is heated to that temperature. The power consumption is about 238 W. To maintain the temperature between 7 p.m. and 8.30 p.m., the device heats the water every 10 minutes with the power of 118 watts for a time of 2.5 minutes. Additionally, you can see the unstable state during the switch (something similar to electrical noise) around 7.20, 7.30 and 7.55 p.m.
Sterilization
Depending on what the water temperature in the device is, the duration of the cycle may vary. It is best seen up close:

It can be noted that around 10.00 p.m. the water was cold enough that the sterilizer needed more time to complete the sterilization cycle. At 10.28 p.m. (that is about 7 minutes after the last action), the device needed less time to perform its function. In addition, for the device to work in the sterilization function, it needs about 473 watts for a longer time.
Thanks to the analysis above, a pattern can be seen, which will be helpful to create an algorithm to send notifications when the sterilization is completed.
The algorithm of sterilization operation and sending notifications to the phone
We now know how much power the device consumes for specific actions and for how long. So let’s plan out what we will additionally need, to conclude that the sterilization has been completed.
My plan was to collect information from the last 4 minutes and check, whether the power value was higher than 400 W for a longer time, and after that changed to 0. And that was a good plan! If only I had an assurance that the device sends such information every X seconds. However, after analyzing
logs from Zigbee2MQTT, it turned out that the plug sends information once every 2 seconds, and another time every 2 minutes. Regardless of whether the device is on, sterilizing or heating.
So, instead of relying on the time buffer, I chose the option: last 10 results. As you know, I like automation in Node-RED and here I have also used this app to create such an algorithm. The finished algorithm:

Already knowing what the main assumptions are, it is time to think about what can go wrong.
A good tester looks right away at the boundary values, before moving on to implementation, as electrical noises can occur (I recommend learning about the debouncing occurrence). Fortunately it is a known phenomenon and it can be easily reduced in the automation app. Next, on the basis of a value we should detect a change of state. If for 40 minutes the power consumption is at 473 watts, or if there are fluctuations in power consumption, it can already be concluded that this is not the right parameter. But the time unit indeed is.
The last issue is this: how we will calculate whether the change of state was momentary (e.g. momentary power drop) or whether the action has been completed. It will be programmed in the state calculation function.
We know what needs to be done, we are aware of what can go wrong, so let’s move on to the specifics!
Actions step-by-step
Information from the plug is sent to Zigbee2MQTT, so Node-RED should be configured to be able to use it. In the app I have several operations adapter to Zigbee2MQTT.
At the moment of configuration I am interested in the IN operation, which is responsible for retrieving the messages from the queue. The figure below shows the activity configuration.
The most important aspects are: server (in my case called Mosquito), device (Sterylizator(TS011F_plug_1)), and then specifying what interesting we can pull out of the logs. In this case I have chosen the power parameter.
As I wanted to rely on the time parameter in the further steps, it was necessary to modify the forwarded message. Using the function operation and JavaScript, I have replaced the message.
Deciphering the code above:
- I am creating a new message with a specific body,
- I am creating 3 parameters:
- power,
- timestamp,
- timechanges.
The most interesting one may be timechanges. It is a parameter, which will be used in the next step and is responsible for the elimination of events excess.
The next step is debounce, which is the reduction of electrical noise. I will rely on the created timechanges parameter in it.
This way I am taking into account the message from the sterilizer that is no younger than 10 seconds from the last one. Having already determined, which values are important to me and what should be their frequency, I move on to the subject of storing them in temporary memory. I choose the last 10.
With the configuration above, these are the results after at least 100 seconds. Therefore, time sufficient to determine whether the sterilization has been completer or not.
Already having data, on which it is possible to perform computational operations, I can use the function operation again and write a function in JavaScript that will check whether the last message contains a value for the power parameter equal to 0. As you remember from the chart, such a value is sent when the device has stopped working.
Describing the code above:
- I am saving the last result from the temporary memory,
- if it is equal to 0, I am checking for how many elements the power was higher than 400 W,
- if the power was higher, I am adding +1 to the temporary parameter,
- I am summing up how many results match the above-mentioned criteria,
- if at least 6 logs match the criteria, I am setting a new message to forward,
- otherwise, it returns nothing to me. Thanks to that no notification would go any further.
The last step is sending the message to the phone. With the help of the HomeAssistant plug-in for the Node-RED app, I have an operation called cell service, which allows sending a notification to HomeAssistant. Thanks to that, and installing the HomeAssistand app on my phone, I will reach my goal!
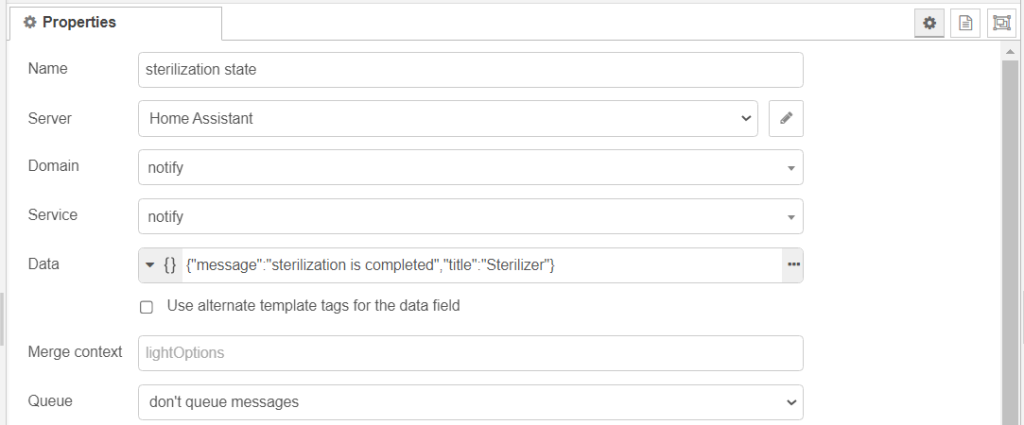
With the data contained in the Data parameter, I control what will be displayed on the phone.
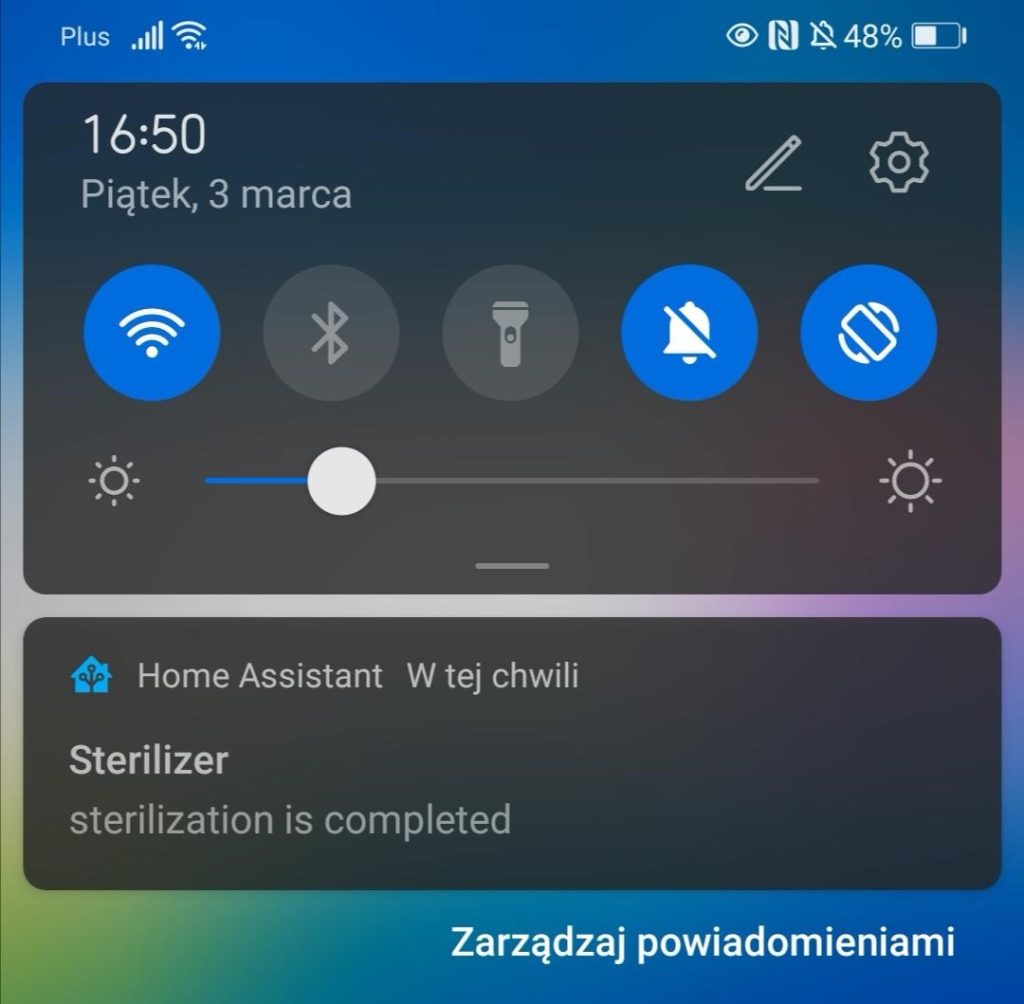
And now, time for the last step! A screenshot after the completed sterilization.
Summary
The goal has been achieved. The article above described an instruction for the device and apps configuration and the decision-making process, so that the notification about the completion of sterilization can be sent. Now I can confidently say that I have another smart device. Additionally, thanks to the information sent in the logs, I know exactly how much power the device consumes. And that’s that! 😊
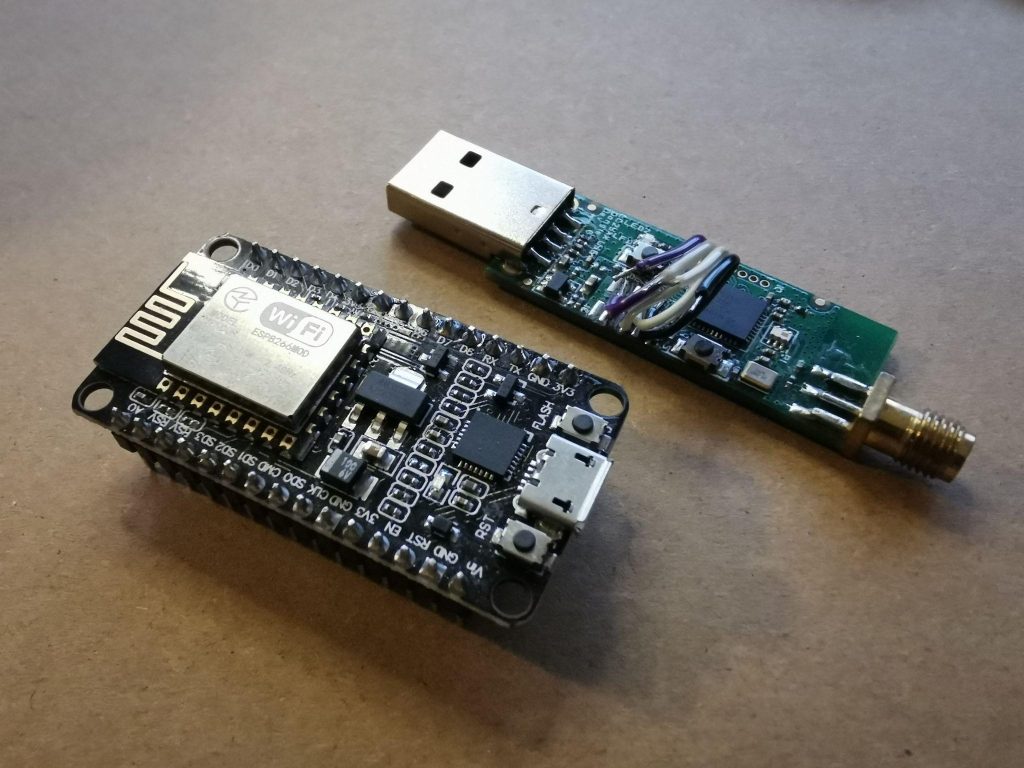
However, to have an even smarter device, able to control turning on specific programs, I had to hack the hardware. For this, I could have used the NodeMCU module or, known from the previous article, successful one-time purchase of CC2531.
Who knows, who knows 😀
Would an article about hardware change and creation of more algorithms be interesting to you? Let me know in the comments! 😊










Leave a comment