For a while now I have been using one of the best growing tools for automating UI tests (but not limited to), which is Playwright. In this article, I would like to show you how to start using Playwright, why it is worth it, and what automated tests in Playwright look like in practice.
Playwright beginnings
Playwright was released by Microsoft in 2020. It is an open-source tool created by Andrey Lushnikov, who previously worked on another popular automation product, which is Puupeteer, developed by Google. Playwright is used to automate actions in the browser, but also allows API automation.
Playwright’s strengths
The tool has numerous interesting advantages, which is why it is worthy of your interest. I will outline them below.
Auto Wait
If you have ever worked on automatic UI tests, you probably know what a problem it can be to handle waits for various dynamic elements located on the page. For Selenium WebDriver, it is recommended to use the so-called Explicit wait, which should solve this problem. However, finding the right wait is not that easy sometimes. It affects how much JavaScript and asynchronous operations are used on the site.
Playwright uses the so-called auto-wait mechanism. What does it mean? In most situations, we do not need to add additional wait for elements, as Playwright itself waits the elements and actions by default. Of course, in a more complex situation, when we need to wait for an element, Playwright provides methods that can be used.
Using different programming languages
Currently, Playwright is supported for several popular programming languages. They are:
- Java,
- C#,
- JS/TS,
- Python.
As a result, the solution in different language versions is finding wider use on the market.
Documentation
Playwright’s documentation is excellent. The use of methods is described on the basis of practical examples, which help to take advantage of the tool’s capabilities. Also, the documentation that appears while invoking a method in the IDE is often enough to make real use of it.
Popularity of the tool
It is worth noting, that the number of Playwright users is growing, as you can see in the graph below.
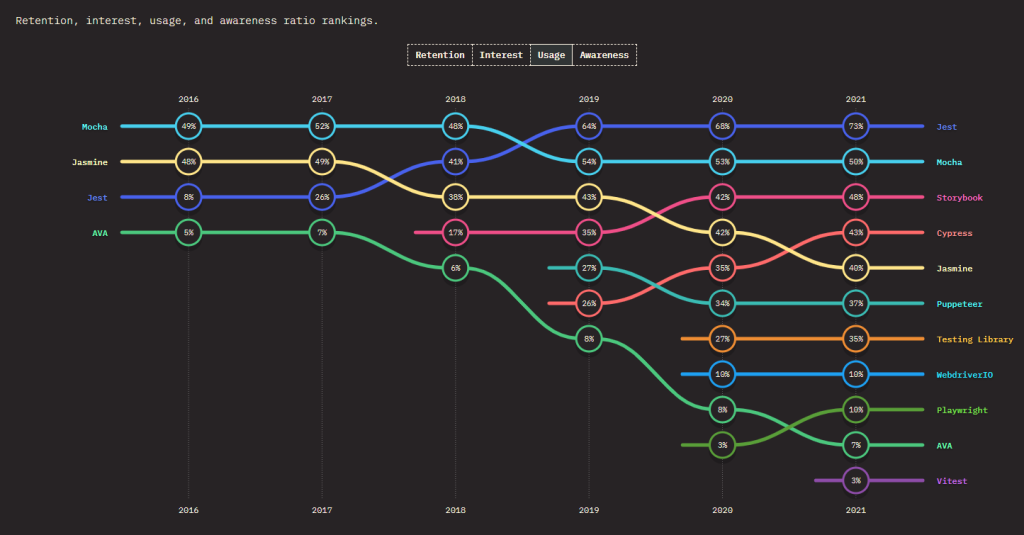
Playwright, among the libraries used in tests, improved its score from 3% usage in the community in 2020 to 10% in 2021. This ranking relates to the Playwright JS/TS version, however in my opinion, it is a noticeable popularity jump, that will be also likely noted for other language versions of the tool.
Awareness of Playwright in the community has also improved, from 19% in 2020 to 34% a year later.
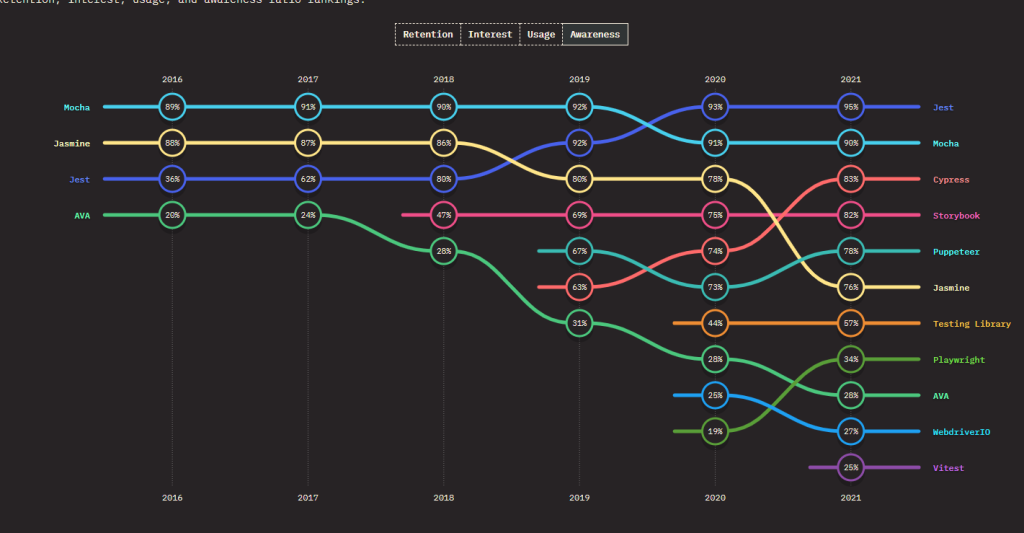
While choosing the tools, it is worth paying attention to their popularity and positive reception by the community, which is something that Playwright has already established for itself.
New versions delivery frequency
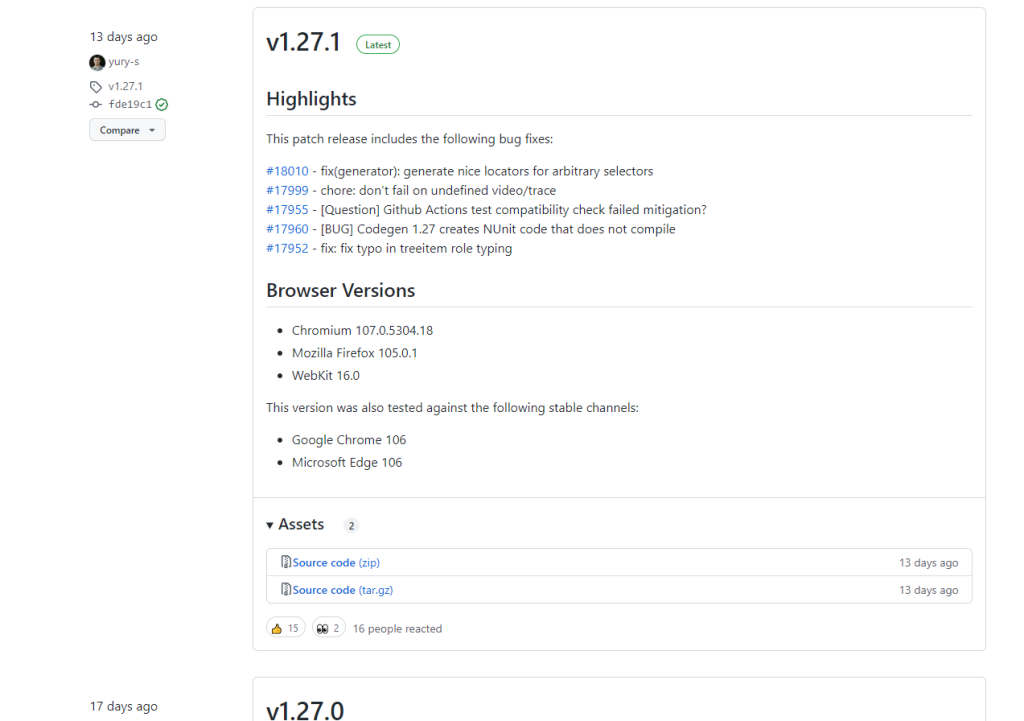
It is undoubtedly worth mentioning how fast Playwright is evolving. Every two weeks or so, a new version is added with some kind of improvements (you can check the frequency of changes on GitHub).
When choosing a potential tool, I always pay attention to the size of the community behind it. In this case, it is Microsoft and its employees, but also a growing number of engaged people outside the company.
Browsers supported by Playwright
Currently Playwright supports all of the most popular web browsers, such as:
- Chrome,
- Edge,
- Firefox,
- Opera,
- Safari.
Also, solutions based on Electron have the experimental support for the JS/TS versions.
Projects using Playwright
More and more projects are admitting/bragging, that they use the tool in their UI tests. They are popular open-source initiatives, but also commercial solutions. A few examples below:


Playwright’s weaknesses
As with any tool, there are times when a method does not work properly in a particular situation. As a Playwright user, I encountered problems only occasionally, but always managed to find a solution. However, I cannot exclude the possibility that in some specific case we may come across circumstances in which the solution will not be found. In that case, it is worth talking to the creators of the tool – they are available and are actively taking part in responding to the reports on GitHub.
Let’s write the first test!
After a brief, theoretical introduction, let’s move on to writing the first automated test in this tool.
Implementation of the automated test
The test that I have prepared will consist of automating a simple test case for a store created for the test purpose. The test scenario looks like this:
- Go to the website: seleniumsklep.pl
- Click on the selected product based on its name.
- Go to the cart and check if the price in the summary section matches the price in the product details.
Go to Visual Studio and start by creating a package library project. This is the preferred type of project. The next step is to add the needed packages using NuGet packages. In our case:
- Playwright,
- Playwright Nunit.

Playwright Nunit includes useful classes, which help the tools work together, e.g. in the context of running tests concurrently.
The next step is to create the necessary catalogs, to organize the solution from the beginning.
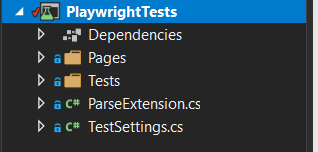
First, create the “Pages” catalog, in which all page objects needed for the automated test will be placed. The next essential catalog, which needs to be added, is the “Tests” catalog.
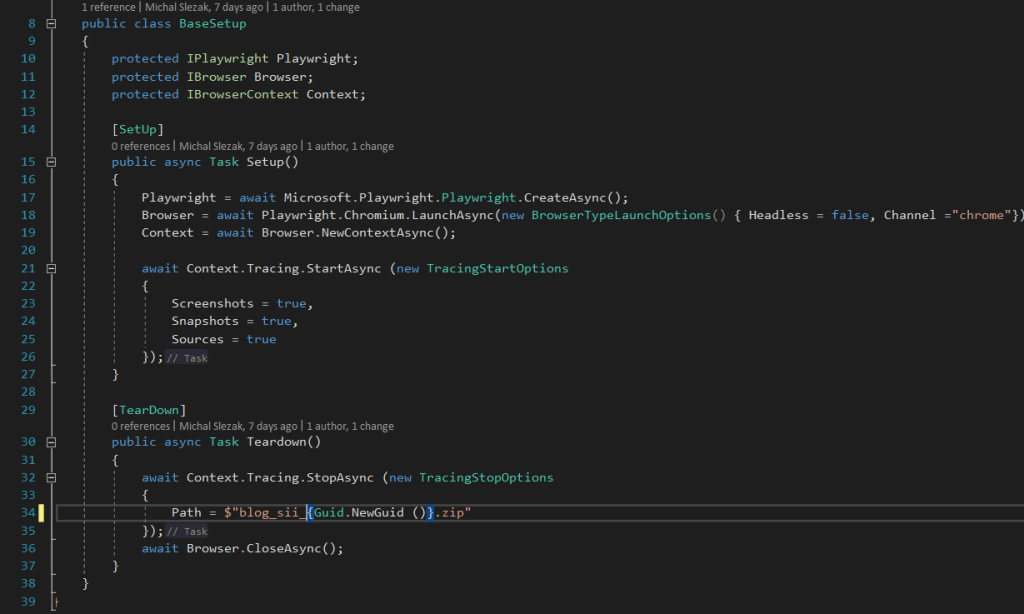
In the BaseSetup class, there are two methods that will be used in all tests inheriting from this class. The “Setup()” method at the beginning initializes the Playwright object. It should be done in line 17. Before it, declare three fields that will be needed in further work.
These fields are:
- Playwright,
- Browser,
- Context.

In the Setup() method, initialize the Browser field, which should be defined to set which browser will be used in the tests. If the Headless parameter is not entered, you will not be able to see the course of the tests – they would run without the graphical mode. It is a helpful option to avoid screen pop-ups with tests.
Another thing that can be set here is the Channel. Playwright allows you to decide which version of Chrome will be used in our automated test. In a very simple way, you can define that you want to use e.g., Chrome beta or Edge in this version. It can be very useful for checking the operation of our application with the upcoming browser versions.


Next, we move on to defining the Context. What is Context? Initialize the Context field, which allows session handling of a given browser. What distinguishes Playwright is that it can handle more than one browser session at a time. Additionally, each screen has a “Focus”, so you if you want to perform an action, you do not have to switch between them.
Also in the Browser object, you could immediately use the NewContextAsync() method, but Playwright’s creators recommend that you create a context every time. Each “Context” stores a separate cache and cookies.

The next step is defining the so-called Tracing. This method allows collecting logs while the automated test is running. We can trace:
- Screenshots – creating a screenshot after each action,
- Snapshots – collecting DOM contents after each action and collecting information from the network, so all requests and information from the console,
- Sources – collecting information on which code line was activated in a particular moment.
Automated test source code
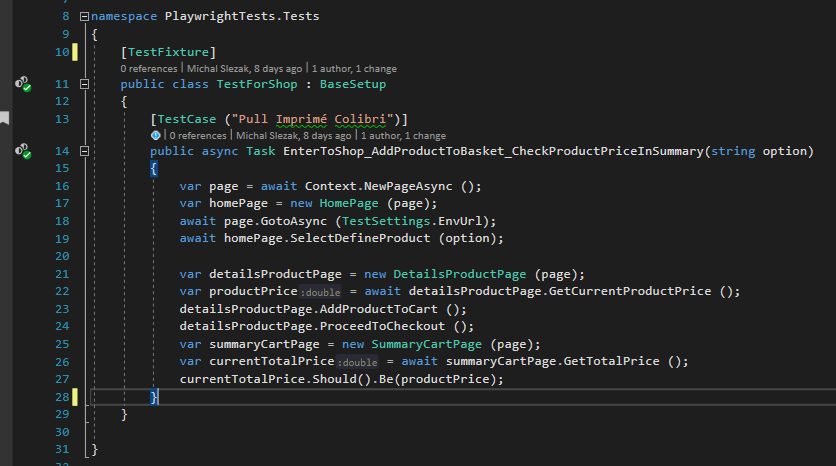
Moving on to the automated test source code, begin with defining the method name. In this case it is
EnterToShop_AddProductToBasket_CheckProductPriceInSummary()
Define “option” as a parameter, so that the name of the article chosen by the test can be passed dynamically. The “TestCase” attribute responds to it. Each next line in a form of the TestCase attribute with an argument, defines the next test case.
Begin with defining the page object. It is responsible for controlling a single tab in the browser (associated with the context, of course).
HomePage
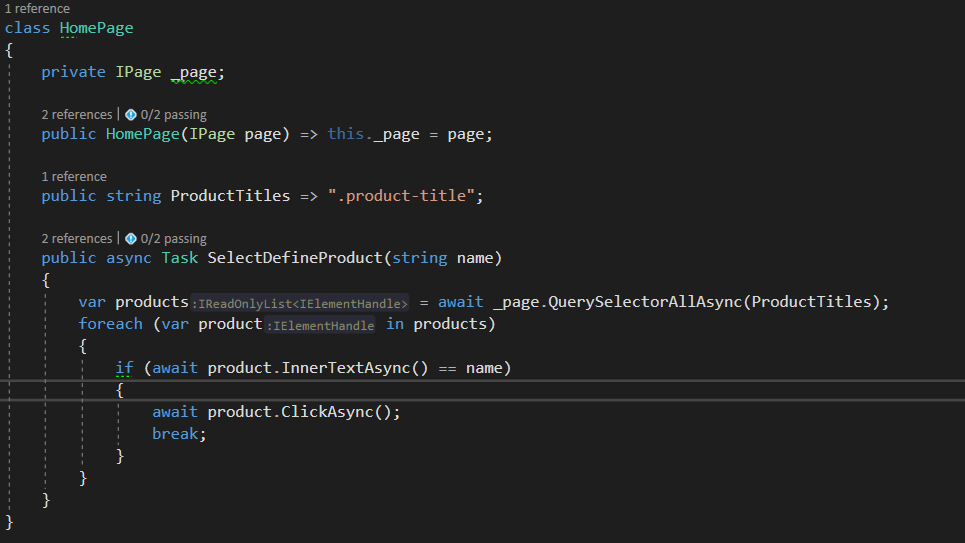
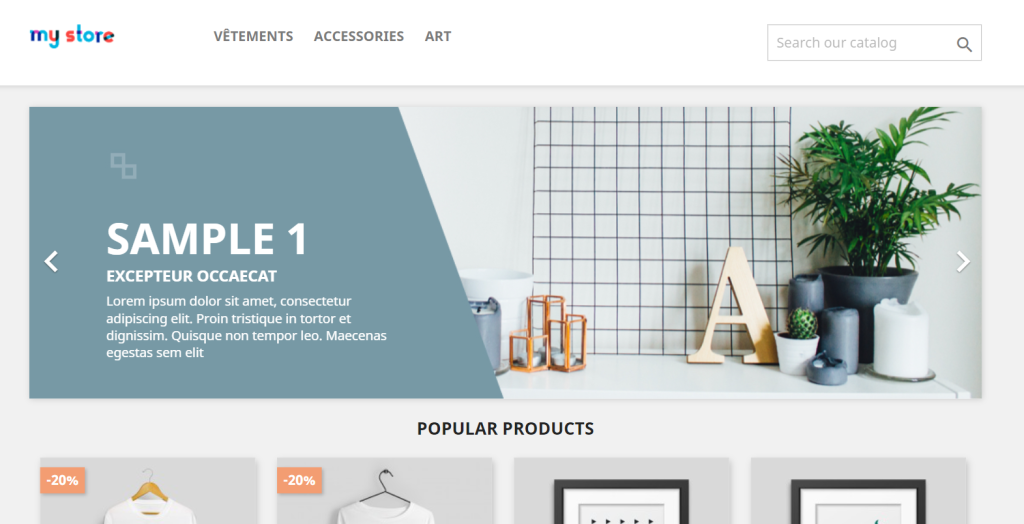
Define page object for the HomePage. The site itself contains a products of interest list.
Start by creating a constructor for this class. The constructor will take the page object as a parameter, which contains methods to control actions related to this page. The next step is defining the ProductTitles fields with a selector corresponding to the name of each product.
You still need a SelectDefineProduct method, which is responsible for clicking on a given product based on its name.


- QuerySelectorAllAsync method – allows downloading all of the elements on the basis of a given selector,
- InnerText method – allows downloading the text from a given element,
- ClickAsync method – clicks on an element of your choice.
An interesting Playwright feature is that most of the used methods have additional uses, that expand the possibilities.

One of them is the ClickAsync method. It allows defining how many times you want to click or determine the wait after the click.
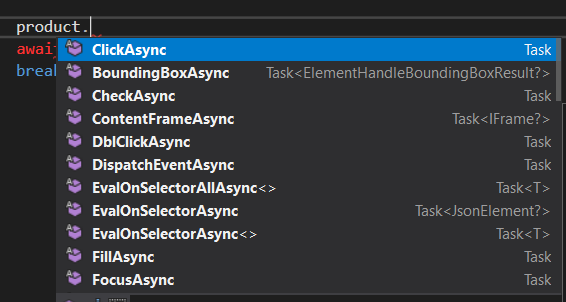
There are a lot of methods, which can be used on a given object. Here are some of them:
Waits
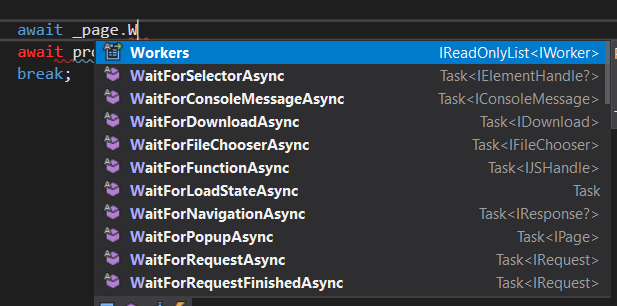
As I have mentioned, for most of the operations there is no need to add any additional waits. However, if the site is more complicated and adding the wait for an element is desired, you can use these methods.
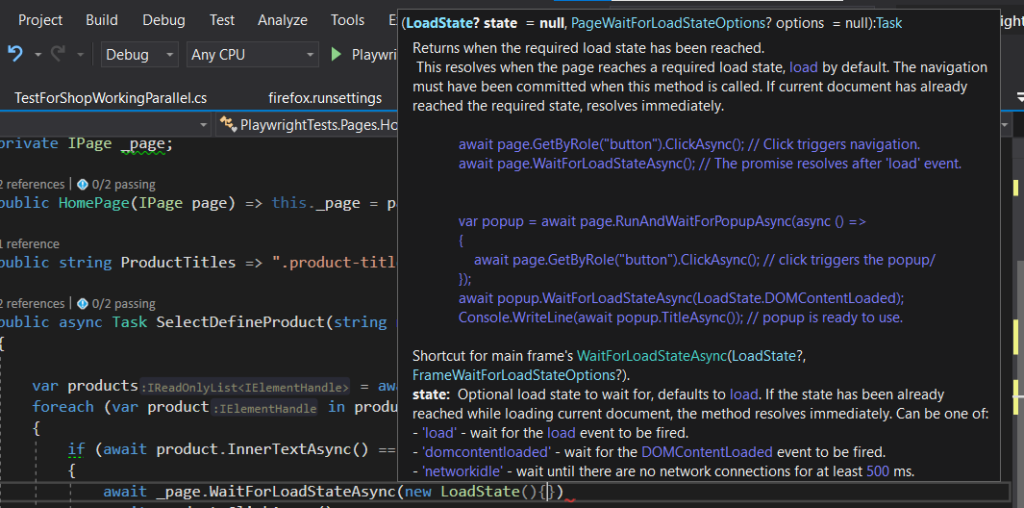
You can wait for such a pop-up or a specific request shows up. This method is useful when switching between pages and you need to wait longer for the page to load.
But back to the test code.

The next step in the line 18 is to use the GoToAsync() method, which will go to the specified page. Save the page address in a separate class TestSettings.EnvUrl. Values such as the address to the environment are best stored in separate classes/files. The GoToAsync method also has an ability to add an additional wait to load the page. The page address should be saved in the property of TestSettings class.

After this step in the test, go to invoking the SelectDefineProduct(option) method. It is the one, that clicks on a specific product. Next, add the DetailsProdcutPage class, where I start by creating the fields needed for the methods, I will be using in the later stages of this test.


Next, add a constructor that through the argument will take the page object, allowing to perform actions related to the page.
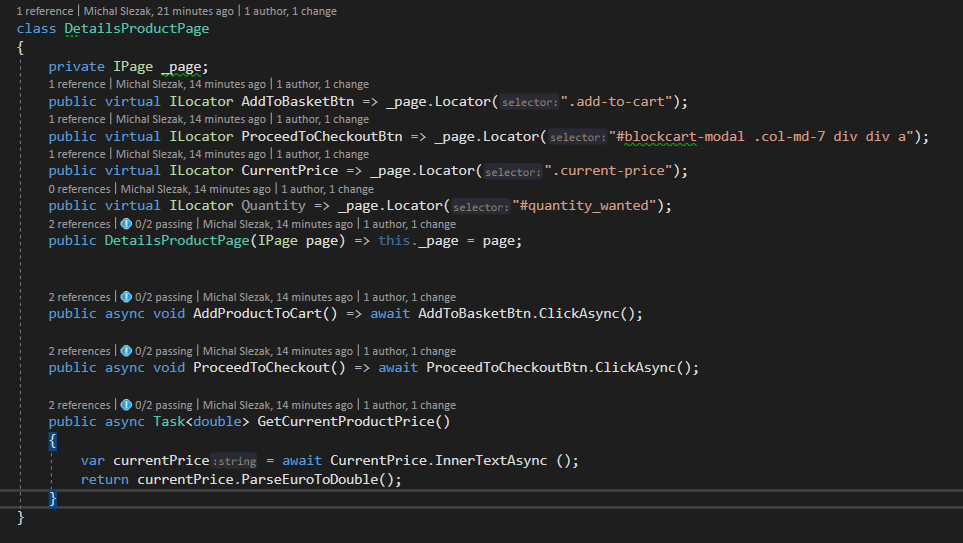
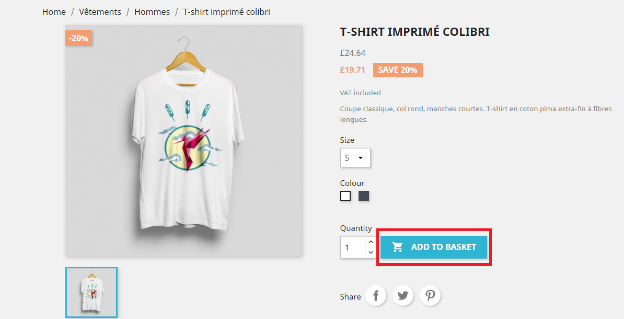
Define the AddToBasketBtn fields. To add and element in Playwright, use the _page.Locator(“selector_name”) method, which allows getting access to the element in Playwright on the basis of the specified selector. The next element, defined in the class, is the equivalent of the “Proceed to checkout” button.
The following field, needed for the test to work, is the “CurrentPrice” field. It allows retrieving the current price for the item.
After defining all the fields required for this test, move on to defining two simple methods:
- AddProductToCart() method contains the click on the add to cart button,
- ProceedToCheckout() method is analogous to the click on the “Proceed to Checkout” button.

Define the GetCurrentProductPrice method, which is responsible for retrieving the current value of the price from the details of this product. You still need to add the ParseEuroToDouble method. It is a method that applies a simple so-called parsing, which, in this case, removes the € symbol from the text. In this case, it needs to be done, because the element is so defined in the HTML of the page.

Of course, this is one way, you can approach it in many different manners. Another idea could be to use some regular expression to retrieve a numeric value from the text. The ParseEuroToDouble looks like this:

Go back to the test source code. Invoke the methods, which allow adding product to the cart.

In the next line initialize the summaryCartPage object. It is an object representing the SummaryCartPage class.
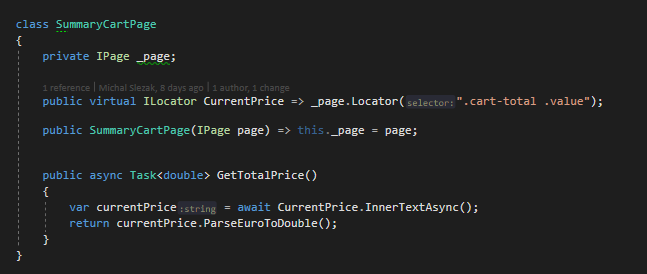
In this class, apart from defining the constructor, add a field, which corresponds to the amount element on the cart summary.

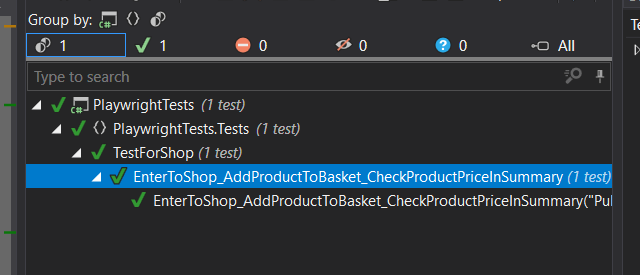
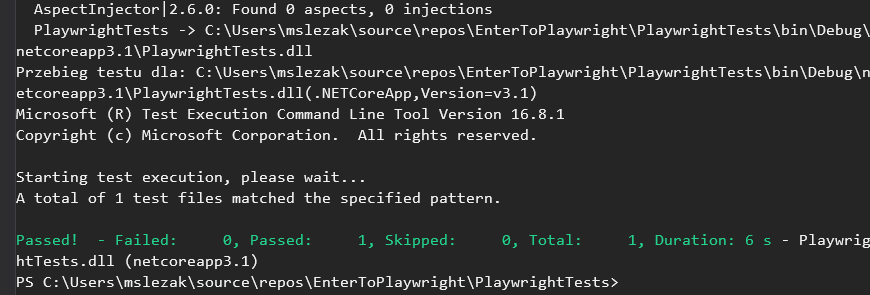
Here I also use the ParseEuroToDouble method, because they are comparable in this situation. After adding this method, return to the test code and compare the value of the currentTotalPrice variable with the productPrice. This comparison uses the FluentAssertations library, which is added via NuGet. It is an assertion library that allows more readable record, than the standard methos from the Assert class. Moving on to the test run. It can be done either using a dotnet test from the VS level or from the VS and R# level.
Summary
In this article, I have showcased Playwright in practice and demonstrated a few fetures that may interest you and convince you to try working with this tool.
In the next part, I would like to present how to use a helpful feature, which is Trace Viewer that allows to view the collected test logs. I will also present other interesting features of the tool.


Leave a comment