Smart Home and IoT. Two phrases that have always been buzzwords to me. Overused, surrounded by mystery, and in most cases, they are all about simple communication between devices. Everything boils down to easier or more difficult configuration (I’m not writing about the cost of equipment and knowledge ;)).
Since the topic is surrounded by mystery and is a niche, I thought I’d try to do it by myself. I wanted to see if I, as a tester, QA Architect with the knowledge of programming and DevOps, would be able to build my own Smart Home using open-source tools 😉 How did it work out? Why did I choose X and not Y? What would I have done differently this time? Let’s find out.
Where did the idea to create a Smart House come from?
Let’s start with the fact that I’m lazy. Productively, but still lazy. In the evenings, when I come out of the shower, I don’t turn off the fan in the bathroom. And then either the fan is running until the morning or I get out of bed sleepy with great difficulty to click the switch. Pointless. Likewise, when going from the living room to the bedroom, I’d like to turn off all the lights in the living room with just one click and turn on the lights in the hallway for a moment (let’s say, for 3 seconds) so that I can go to the bathroom/bedroom. Do you know how much effort it is to click all the switches? 😉
And this is when laziness comes in handy! I heard about ready-made solutions related to light control, sockets, etc. But I thought, ‘Meh! That’s not for me.’ Not only is this expensive, but also all the information will be made available to the outside world (that is, someone can easily connect to my network). I protect my privacy and I don’t want my data to be shared unnecessarily, so I prefer a private cloud over a public one.
So, if I don’t want to spend a lot of money, and I want to keep my data secure, then the cost must be different, and it’s my time. After all, I’m technical so I’ll easily manage because what isn’t done in the name of development. And I’ll gain additional experience! Probably painful, frustrating, but at the end I will be satisfied 😉
Communication between devices
Before describing my adventures with configuration and choosing the right tools, I’d like to mention how the devices communicate in the Smart Home.
In communication, we have a sender and a receiver. In my case, the sender can be an application on the phone with programmed automation or a physical button. The receiver is the corresponding behavior (e.g., turn on the light in the kitchen. But how do they know that these roles are assigned to them?
Well, with the help of a gateway. A gateway is a device that is a switchboard that manages all communication. And this is where I could have ended my article, if not for the fact that I wanted more freedom. I didn’t feel the need to be limited by some company. Read-made solutions usually result in more difficult integration between various manufacturers, inability to modify them, or transmitting data I don’t want to show to the world. Often, it also comes with a higher one-time cost or subscription.
So I decided to configure my own switchboard! I already had the basis: Raspberry Pi4, on which one system – OctoPrint – was installed. All I was missing was a device which would serve as a starting node (that is, something to which you will connect the other IEEE802-compatible devices).
The advantage of such a solution is the freedom to configure and modify the behavior. Something the ready-made gateways won’t provide me. Spoiler alert: now I’d use docker images to configure the devices, but I chose a different path. As it turned out later… for the advanced.
What goal did I want to achieve with IoT?
Definitely lightning control! Yes – in my mind’s eye I could already see myself lying on the couch and turning off the lights or checking the humidity in a room from my phone. I also considered the possibility of automatically turning on the fan when the humidity exceeds 60%.
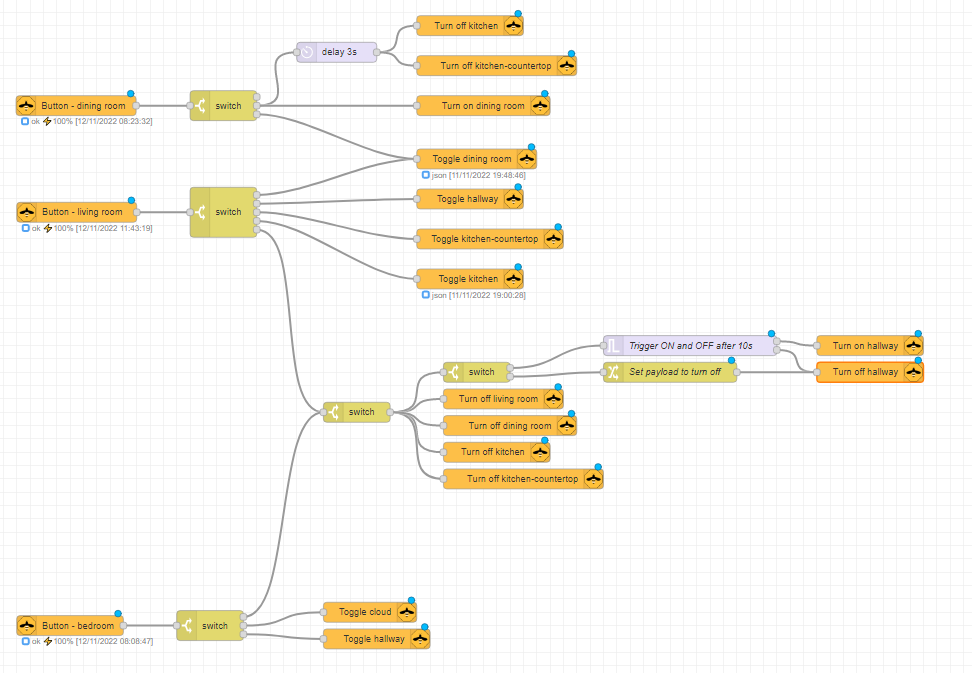
So, I started, as befits a true amateur-future expert, to educate myself! I read what could be done and how. And then came the revelation. And frustration too 😉 What would an IT architect do in a situation when they start a new project? Of course, they’d drew out diagrams with stages. What, where and to what. This approach resulted in the diagram you can see below (already in the target tool – Node-Red, which I’ll write about later), which is a transfer of my ideas to paper about how I’d like to make my life easier. Thanks to that I already knew how many devices I needed and, more or less, what type of switches to look for.
I already had the goal, place and a scheme of action. All that was missing were plans how to do the project and what tools to use.
Choice of tools – hardware
After browsing Allegro, AliExpress and reading a few articles, the choice of the equipment was easy. Looking at the successes and failures of others, I decided on devices that support the Zigbee wireless protocol.
Advantages of the protocol:
- easy to increase coverage by installing transmitters (role: router),
- low unreliability,
- transmission is authenticated,
- two-way communication,
- immediate access (protocol also used in motion detectors),
- ease of creating and expanding systems,
- no use of Wi-Fi.
An alternative for the chosen protocol can be Z-WAVE, which is certified. After comparing the two, I assumed that Zigbee would be efficient enough, cheaper and it has very strong community support (although it’s chaotic). Additionally, there is no limit on connections and data transfer in the mesh network (Z-WAVE has a limit up to 4 devices, and the network can have a total of 232 connected devices). I doubt I’d ever need that many, but why limit yourself).
The downside may be the frequency at which Zigbee operates. It’s similar to Wi-Fi, which could have been a drawback, but I haven’t noticed it so far.
In Zigbee, there are three roles:
- coordinator
- router,
- target device (sockets, switches).
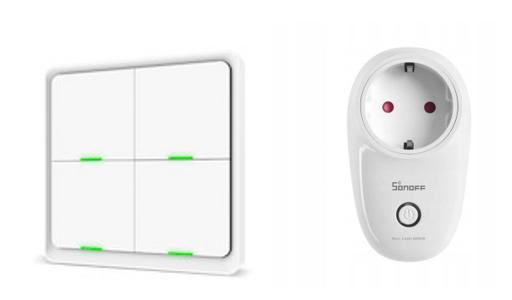
There is only one physical coordinator in this, and the target device can also be a router. For the second time, I chose a Sonoff hardware key as a coordinator. My first choice was CC2531 from AliExpress.
It was a good, one-time choice. The device turned out to be highly unstable, but for testing whether it’s worth following the path of automation, as worth its price (PLN 40). After a few months, I can write that Sonoff, however, is less unreliable. I hardly had any problems with it at all.
And that’s how the devices were carefully selected not to use Wi-Fi. In addition, I chose Tuya and Sonoff switches for a couple of reasons:
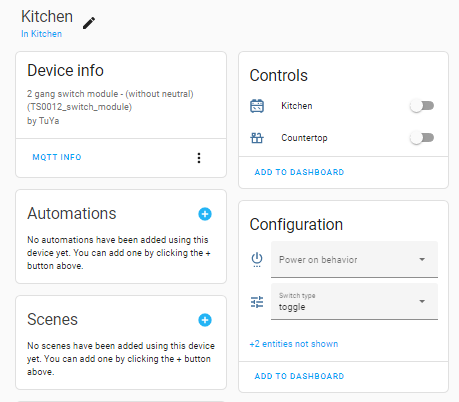
- the only quadruple switch that doesn’t have to be installed on the box (no changes to the electrical system and preserving a consistent design) – from Tuya,
- battery-powered,
- can be installed anywhere,
- price (I’ll describe the entire cost at the end).
Post factum: only later, being in IKEA, I noticed that this network has also its own switches and switchboard called IKEA Tradfri. So does Lidl… But what fun it would’ve been, if I chose the easy way 😉
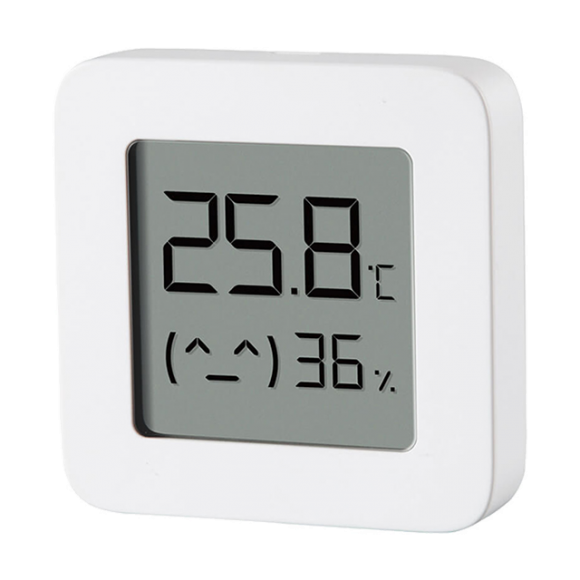
Due to the practicality (data available at once) and design, I chose Xiaomi humidity and temperature monitors. They use Bluetooth Low Energy.
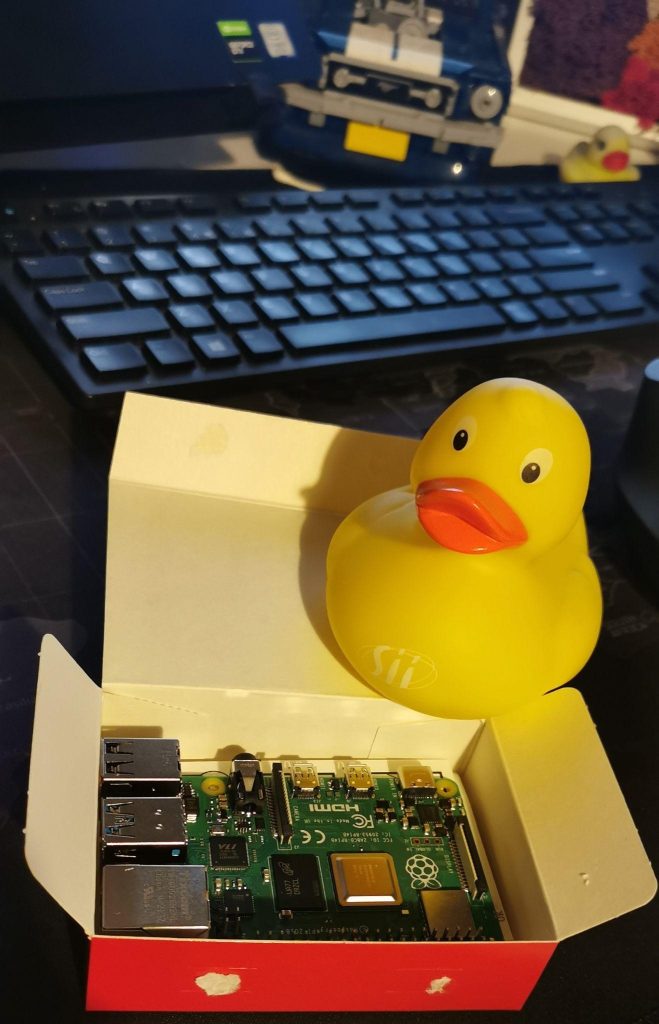
The computer on which everything was configured was a Raspberry Pi4. Due to the purely ‘nerd’ vibe in my house, I found it next to the soldering iron. Previously, it was used, among other things, to operate a 3D printer and expose my training applications related to performance testing and API to the world.
Since I already had the system (OctoPrint) installed on the raspberry, I didn’t want to use docker images and modify the current state. I assumed that the configuration of the new software would be a piece of cake! Ough, how wrong I was…
To sum up: I had a scheme of how my Smart Home was going to work and I chose the devices. It was time to deal with the software!
Choice of tools – software
Let me state right away: I chose HomeAssistant, Zigbee2MQTT, Mosquitto and Node-Red. You’ll find the explanation below.
Firstly, I’ll describe what I was looking for in the software:
- a nice UI that would provide me with user-friendly device controls,
- easy behavior automation (i.e., an algorithm for how a particular device should behave after a given sequence),
- integration between the coordinator and the target device,
- software to manage queues,
- devices configured on a local network,
- access to devices from anywhere I have the Internet connection, connecting directly to my home network rather than via the cloud.
As I already mentioned, I wanted to work in open-source. The existing solutions didn’t meet all the aforementioned conditions. So, all that was left was the integration of a few software packages.
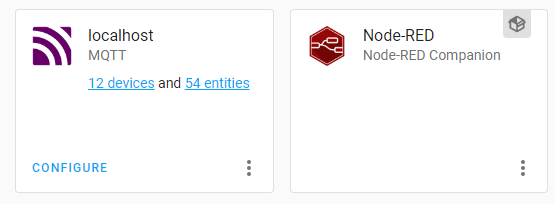
I achieved my goal, among other things, with the help of HomeAssistant. When using it and being away from home, I connect directly to my home network rather than a public cloud. Proper configuration of HomeAssistant, which consumed a couple of evenings and cups of coffee, granted me apparent peace of mind, handling behavior and security. Did I mention that I didn’t go the easiest way using docker images? 😉
Today I know that I would’ve made changes to the Raspberry configuration. Raspberry would be set up to run docker containers, e.g., from HomeAssistant, Node-Red, OctoPrint. I believe this would facilitate later modifications, updates, and provide separation of applications.
HomeAssistant
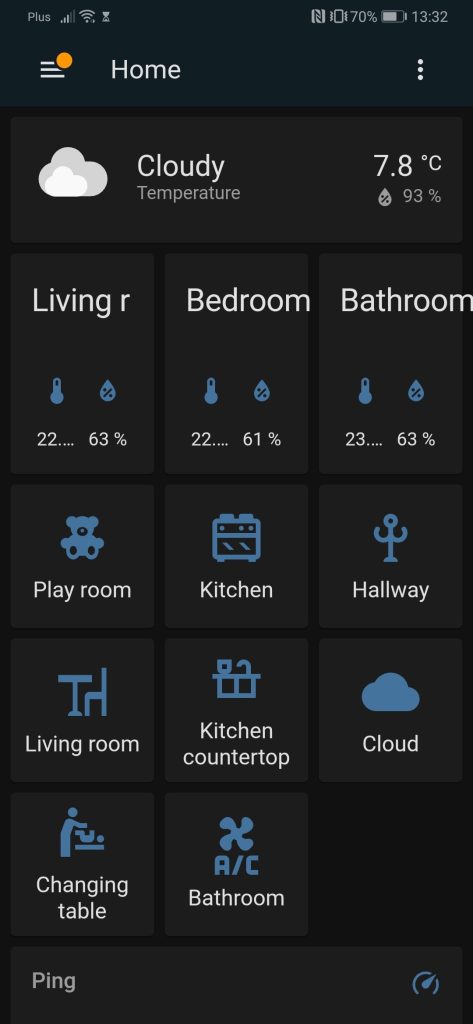
HomeAssistant is an application that can officially treated as a central system for controlling everything in the house. In my case, it’s a high-level control because I treat the program rather as a UI to hook up everything underneath. In theory, you can find a lot of user guides and documentation in the Internet, but as often happens – I couldn’t find what I needed.
I also created a nice panel which looks on the phone as follows:
I could’ve used HomeAssistant to automate behavior, but in this case – Nod-Red won. In my opinion, it’s more intuitive (the diagram shown above), easy to use, and after a problematic configuration of HomeAssistant I said: enough! Of course, the configuration problems were at my own request, but please – enough is enough!
Node-Red
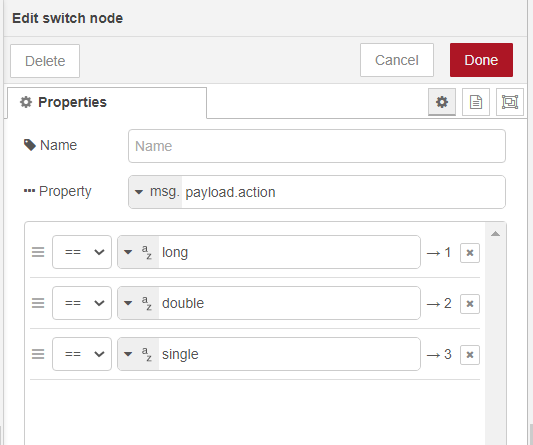
The Node-Red tool allows you to easily manage behavior and the entire flow of events that are nothing more than, a click on a button, for example. Physical buttons give the ability to control. You can do, e.g., double-click, single-click and long-click. And this allows you to create an interesting configuration. In the diagram below, I presented one of the behaviors for a button in the dining room.
For the double-click, I assigned the following actions:
- turn on the lights in the dining room (unless they’re already on),
- after 3 seconds, turn off the lights in the kitchen (unless they’re already off).
At this stage I knew what I wanted to achieve, so it was time to show the tool in action!
In the application, it looks like as follows. After adding a button to the diagram, I specified what types of physical clicks on the target device can be made and what triggers them (payload.action).
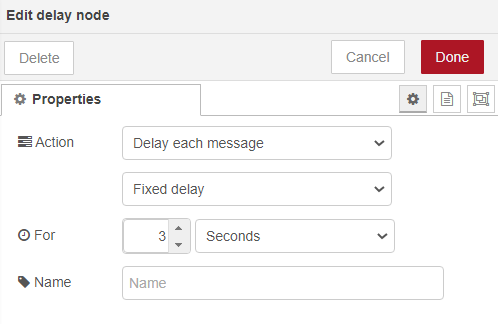
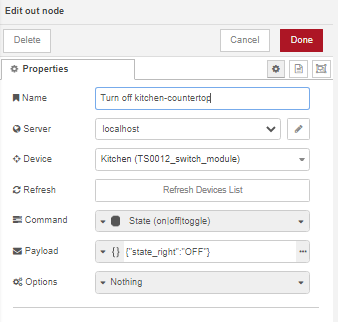
Then, I configured the delays and set the kitchen lights to turn off.
I will add that I can also turn off the lights in the entire house from my bedroom 😉
As a downside of being able to configure so many different behaviors and the number of physical switches plugged into the network, I must admit that, at first, I didn’t always remember what each click did. Things are better now.
Zigbee2MQTT and Mosquitto
We’ve got UI for the smart home, we have the automation done for the buttons, but these two worlds need to be connected somehow. And this is where Zigbee2MQTT comes to the rescue, which is a bridge or software that allows integration.
My hardware key already had the firmware installed by the vendor to enable using Zigbee2MQTT, so the choice of software here was simple. Connecting the physical device to Zigbee2MQTT is easy – you simply search for the device in the app and pair them. Something I liked – clear logs, in a user-friendly visual format.
I used Mosquitto to handle queues. Unfortunately, there is no UI here. The choice was prosaic – the first result in Google on MQTT implementation. Of course, the configuration on a Raspberry.
Summary
Was it worth it? YES! I learned many things, like configuration. I deepened my knowledge of the Zigbee protocol, Raspberry and I know I want more. I’m also aware that after the initial frustration at the number of articles and not-so-friendly documentation comes calming down and slowly moving towards the goal. In addition, after adding a few lines of the code, the bathroom fan turns on by itself when the humidity is above 60% and turns off when it drops to 50%.
Investment cost: PLN 700 for devices (without Raspberry, but its price used to be PLN 340). Considering the time and experience gained, I think the financial cost is very low. Thanks to what I’ve learned, I’ll soon prepare a Smart Home configuration on a larger scale.
If you want to read my next adventures with this type of modification – let me know in the comments, because I’ll be creating a cluster from the devices below, and its use is already planned 😉







Leave a comment