Power Portal provides an easy way to display data to external customers. They can log in using their Azure AD B2C, Facebook, Google or Microsoft accounts and it is also possible to display data anonymously for everyone. Most solutions are designed to be low-code for showing or performing operations on the Dataverse.
Microsoft decided to make life easier for developers and provided a Web API for Power Portal. Usually, such an interface allows you to create CRUD (Create, Read, Update, Delete) operations. In this case, however, we have only available ‘create’, ‘update’, ‘delete records from the table’ and ‘create or delete relationships between records’.
The problem with reading from the database interferes with work, if not prevents it. To solve this problem you can create Web API with the use of FetchXML and Web Template. I will write another article about this.
Site Settings
To enable WebApi, make the following entries in the Site Settings table:
| Name | Value |
| Webapi/contact/enabled | true |
| Webapi/contact/fields | address1_telephone1 |
| Webapi/error/innererror | true |
- Webapi/contact/enabled – enables the Web API for the Contact table.
- Webapi/contact/fields – here you should list all the fields you want to modify.
- Webapi/error/innererror – enables internal error forwarding to the Web API.
Permission settings
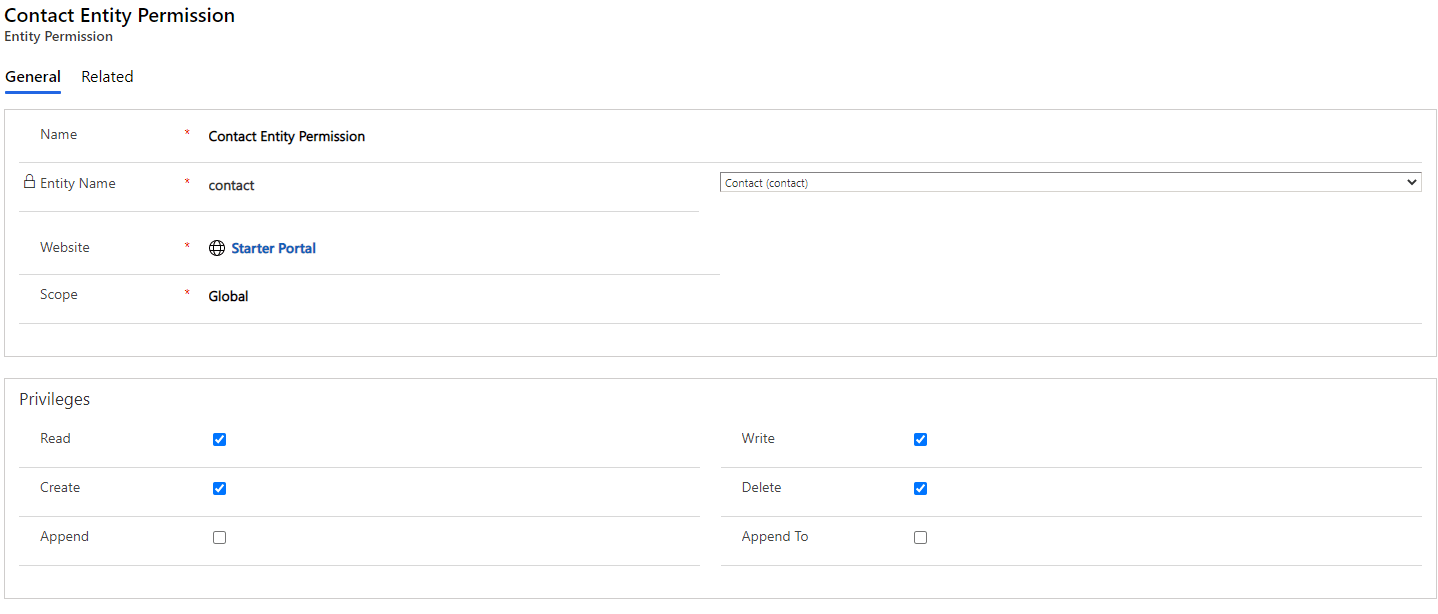
Setting permissions allows you to restrict or grant access to operations to a group of users. We add an entry to the Entity Permissions settings:

- Entity Name – select the table that you want to grant permissions to (Contact).
- Scope – we have a choice of: Global, Account, Contact, Self, Parent, we select Global. More about scopes you can read in the official documentation Configure security using table permissions – Power Apps | Microsoft Docs.
- Priviliges – we mark the operations that users will be able to do.

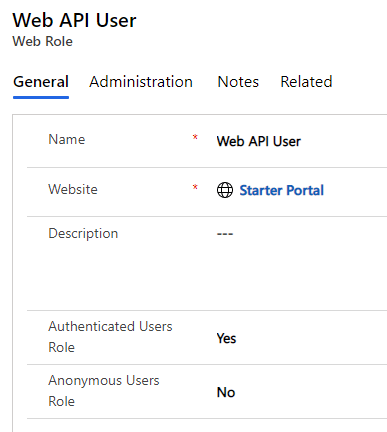
The next step is to create a Web Role in the Web Roles table and we call it Web API User
- Authenticated Users Role – set to ‘Yes’ allows logged-in users to invoke operations on the Web API.
- Anonymous Users Role – set to ‘No’ to block access for unknown users.
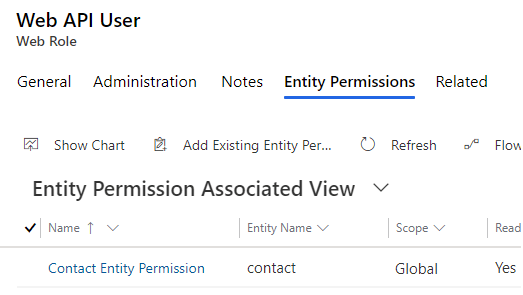
The final step is to go to the Entity Permissions tab of the Web Role and add the Contact Entity Permission record you created earlier.

The code
let token = await shell.getTokenDeferred();

await fetch(`/_api/contacts(53bf9109-9c00-46b9-b99c-0eb5f986c97a)`, {
method: 'PATCH',
headers: {
Accept: 'application/json',
'Content-Type': 'application/json',
__RequestVerificationToken: token,
},
body: JSON.stringify({
address1_telephone1: '555-555'
})
});
The code above is an example of updating data on a specific record in the Contact table. In the first line, we call the getTokenDeferred method, which will return a unique token for us to authenticate to the system. On the next line, we invoke the Web API, using the schema: /_api/tablename(record guid), using the PATCH method. The additional header __RequestVerificationToken stores the token retrieved earlier. In the body, we enter our object in schema: fieldname: ‘value’ and then change it to a string.
Assigning a reference to a record
The example of adding a file shows how you can create a link to an already created record in the Contact table. First, we need to create the rights for the Annotation (Note) table in Entity Permissions (select Create, Append To) and the entries in Site Settings as for Contact, adding the filename, mimetype, documentbody, and objectid_contact fields. For the Contact table permissions, we must additionally check Append.
let token = await shell.getTokenDeferred();

await fetch(`/_api/annotations`, {
method: 'POST',
headers: {
Accept: 'application/json',
'Content-Type': 'application/json',
__RequestVerificationToken: token,
},
body: JSON.stringify({
filename: fileName,
mimetype: mimetype,
documentbody: base64Content,
'[email protected]': `/contacts(53bf9109-9c00-46b9-b99c-0eb5f986c97a)`,
})
});
In the example above, in line #14, a bind to the Contact table is created on the objectid field. Adding @odata.bind to the field name lets us know that it is a reference to another record. You can add and remove relationships to other records in this way.
Summary
Using the Web API in Power Portal can replace the creation of an Entity Form. This can help you build a more enhanced form and complex business logic. It is possible to build a form view entirely from scratch if this is required by our design approach and requirements from a client, who wants to create a very unusual form. Currently, some of the Plugin’s actions cannot be used, e.g. PreValidation and PreOperation actions are not supported, what is the disadvantage of using this solution.


Leave a comment