In today’s fast-paced world, time is priceless for clients and businesses. Effective management of meetings and schedules is a key element in the success of any organisation. This is why Microsoft Bookings, is becoming an indispensable support for companies, freelancers and entrepreneurs who want to optimise their meeting scheduling process.
Microsoft Bookings is a cloud-based solution that enables easy and intuitive booking of meetings. This system is available in Microsoft 365 and enables businesses in a variety of industries to organise meetings efficiently and eliminate the difficulties associated with traditional scheduling methods.
In this article, I will focus on Microsoft Bookings and outline the various situations in which this tool can be extremely helpful. I will also analyse the key features, the benefits of using Microsoft Bookings and the possibilities for automation using MS Graph and Power Automate.
Examples of use
In companies where there is a high turnover of employees or a large number of people are being hired, this tool can facilitate the organisation of interviews. Such a company can send candidates links to a calendar where they can choose a convenient date, and thanks to the integration with Microsoft Outlook, only dates that are free for all the required members of the company will be visible.
When booking an appointment, you will be required to provide a name and an email address to which confirmation of the appointment booking will be sent, and to which reminders can come. Importantly, the email address does not need to be linked to a Microsoft account. To ensure that a genuine email address is provided, it’s possible to set up the automatic sending of a verification code. In the event that someone changes their mind, an appointment can be easily cancelled or rescheduled via a confirmation email.
Schedule of medical visits
Managing appointments and visits is vital for patients and medical staff in the medical sector. With Microsoft Bookings, clinics and other medical institutions can significantly improve the organisation of appointments. Patients are able to check availability and book appointments themselves via the website, check and receive notifications reminding them of upcoming appointments. This reduces the burden on administrative staff, while increasing patient satisfaction, who can easily find a convenient appointment and avoid long waits at the hotline.
Organisation of trainings
Microsoft Bookings is also used in the organisation of training, workshops and business events. Organisers can create events, set deadlines and limits on the number of participants who are able to sign up for the chosen date themselves. This greatly simplifies the registration process, eliminates the need for email or telephone communication and keeps track of the number of participants.
Beauty salons
In beauty-related areas such as beauty salons, spas and hairdressing, Microsoft Bookings helps you effectively manage the schedules of clients and service providers. Customers can choose specific services, preferred dates and the availability of a specific specialist. Another advantage from the customer’s point of view is that for each service it is possible to specify the price and duration of the service. For salon employees, this tool facilitates the organization of work and minimizes potential gaps in the schedule.
In addition, notification functions reminding you of upcoming visits allow you to reduce customer absences and make the most of your time.
Configuration
The first step in creating a calendar is to access the Microsoft Bookings page by logging in with your corporate account. On this page, you will see your personal booking page, all the booking pages that have been made available to you, a search and a ‘Create’ button for creating new booking pages.

After pressing the Create button, we are guided through a wizard in which we choose whether we want to create a calendar from scratch or clone an existing page we already have access to, and then configure our new calendar.
All of the settings you select when creating your calendar can be changed later without any problem. Once the calendar has been created, we are redirected to its edit page. You can access the calendar here, which shows all the employees you have added. On the left-hand side, there is a menu from which you can select what you want to edit:
- Booking page – editing information about access to the booking page, its appearance and required consent.
- Customers – people who have booked an appointment on this booking site will appear under this tab.
- Staff – a list of employees who can be assigned to services. Information on their permission level is also added to this list.
- Services – you configure here all the services you want to see later on the booking page. Services can be of type:
- 1:1 – one customer and one employee,
- X:1 – one or more customer and one employee,
- 1:Y – one customer and one or more employees,
- X:Y – one or more customer and one or more employees.
- Business information – general information about the company such as address, logo, type of business, working hours
- Integrations – additional services that can be configured to extend the functionality of the application.
Management
By default, once employees have been enabled to use Microsoft Bookings, any employee who enters the tool’s website can create their own booking pages. On the one hand, this is very convenient, but on the other hand, the user is not able to delete a booking page on their own. Each such page is a separate account in Azure Active Directory.
Therefore, some companies choose to block this option and their creation requires approval. This can be achieved by using policies and blocking the creation of calendars by all but a few authorised users or service accounts. How to block and enable the creation of calendars by selected accounts is well described in Microsoft documentation.
REST API i Graph Explorer
Microsoft Bookings provides a REST API through which, among other things, calendars can be created and deleted using, for example, MS Graph. Using an authorised account, it is possible to test its functionality via Graph Explorer.


After running the query shown in the graphic above, we get a response with all the details of our new calendar. Almost all the parameters we get in the response are editable except for the id, which is the account that is automatically created by Microsoft Bookings. The account name in this case is TestGraphAPI@[tenant name].onmicrosoft.com.
If required, many other parameters can be set in the query that creates the calendar, such as:
- the default currency,
- telephone number,
- email address,
- working hours, etc.
All parameters are described in the documentation available on the Microsoft website.
Custom connector in REST API
To be able to use the REST API, in Power Automate we need to register an application in the Azure portal, from which we will need the Client ID and secret. To make sure that no unauthorised person can access this data we can create a custom connector that will send requests to the REST API. This process is described in detail in the Power Automate forum. The most important points from this manual are:
- Register the application. Give it any name you like and set the redirect URI to Web and enter https://global.consent.azure-apim.net/redirect in the address space. This is very important because without this step we will not be able to create a connection to the custom connector later.

Fig. 4 Registering applications in Azure AD
- Creation of a custom connector
- Give custom connector a name, which we will later use in the flows

- in the next step in the Host we specify „graph.microsoft.com”

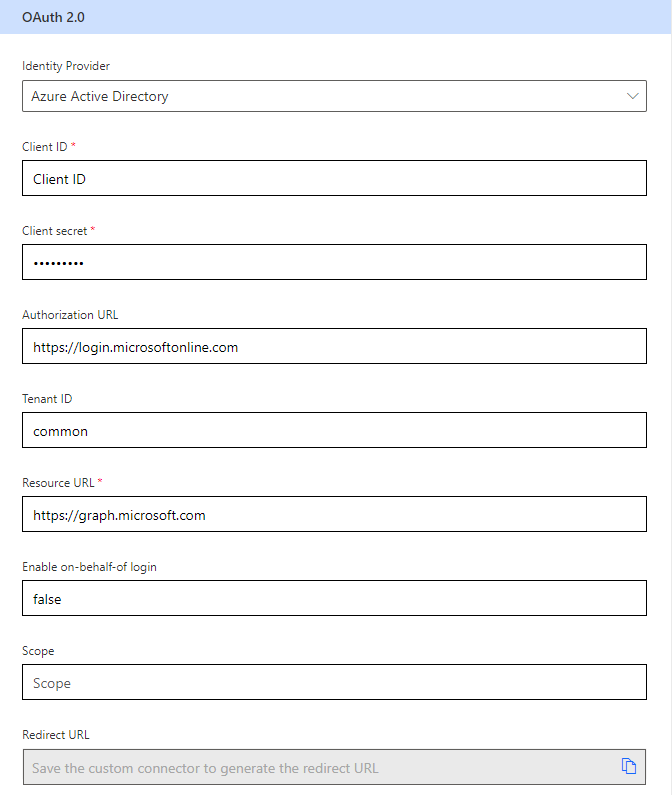
- In security specify:
- Authentication type – OAuth 2.0
- Identity provider – Azure Active Directory
- Client ID – Client ID from the registered application in step 1
- Client secret – secret from the registered application in step 1
- Resource URL – https://graph.microsoft.com

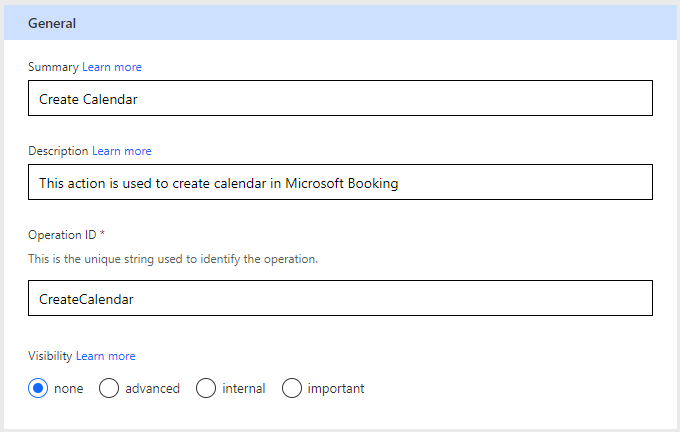
- in the definitions, select new action and then fill in general information

Under Request, we select Import from sample, where we specify
Verb: POST
URL: https://graph.microsoft.com/v1.0/solutions/bookingBusinesses
Body:
{
    "displayName":"",
    "phone":"",
    "email":"",
    "webSiteUrl":"",
    "defaultCurrencyIso":""
}
Then press “Import”.

- Before testing the custom connector, it must be saved by pressing Create connector

Once the connector is saved, we can create a connection using an account that can create calendars and test our custom connector


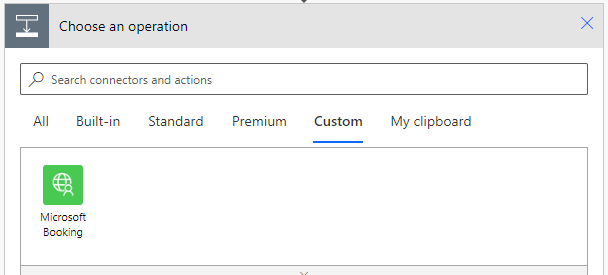
The custom connector prepared in this way can now be used in Power Automate. It will be available in custom actions

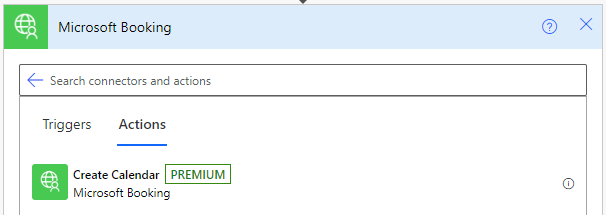
When you select Microsoft Bookings, all the available actions that have been added to the custom connector will appear

When you select Create calendar, the same parameters will appear as when testing the connector

In the manner described above, you can prepare all the actions related to Microsoft Bookings that are available in the REST API. In this way, you can create workflow that will create, modify and delete calendars. A list of functions is available on the Microsoft website.
Summary
Microsoft Bookings makes it easier to manage calendars in many industries, increasing the satisfaction of both companies and their customers. I hope that the presented functions will be useful to you in your daily work, as well as the possibility of automation using MS Graph and Power Automate.
***
If you are interested in Microsoft 365 tools, be sure to check out other articles by our experts.


Leave a comment