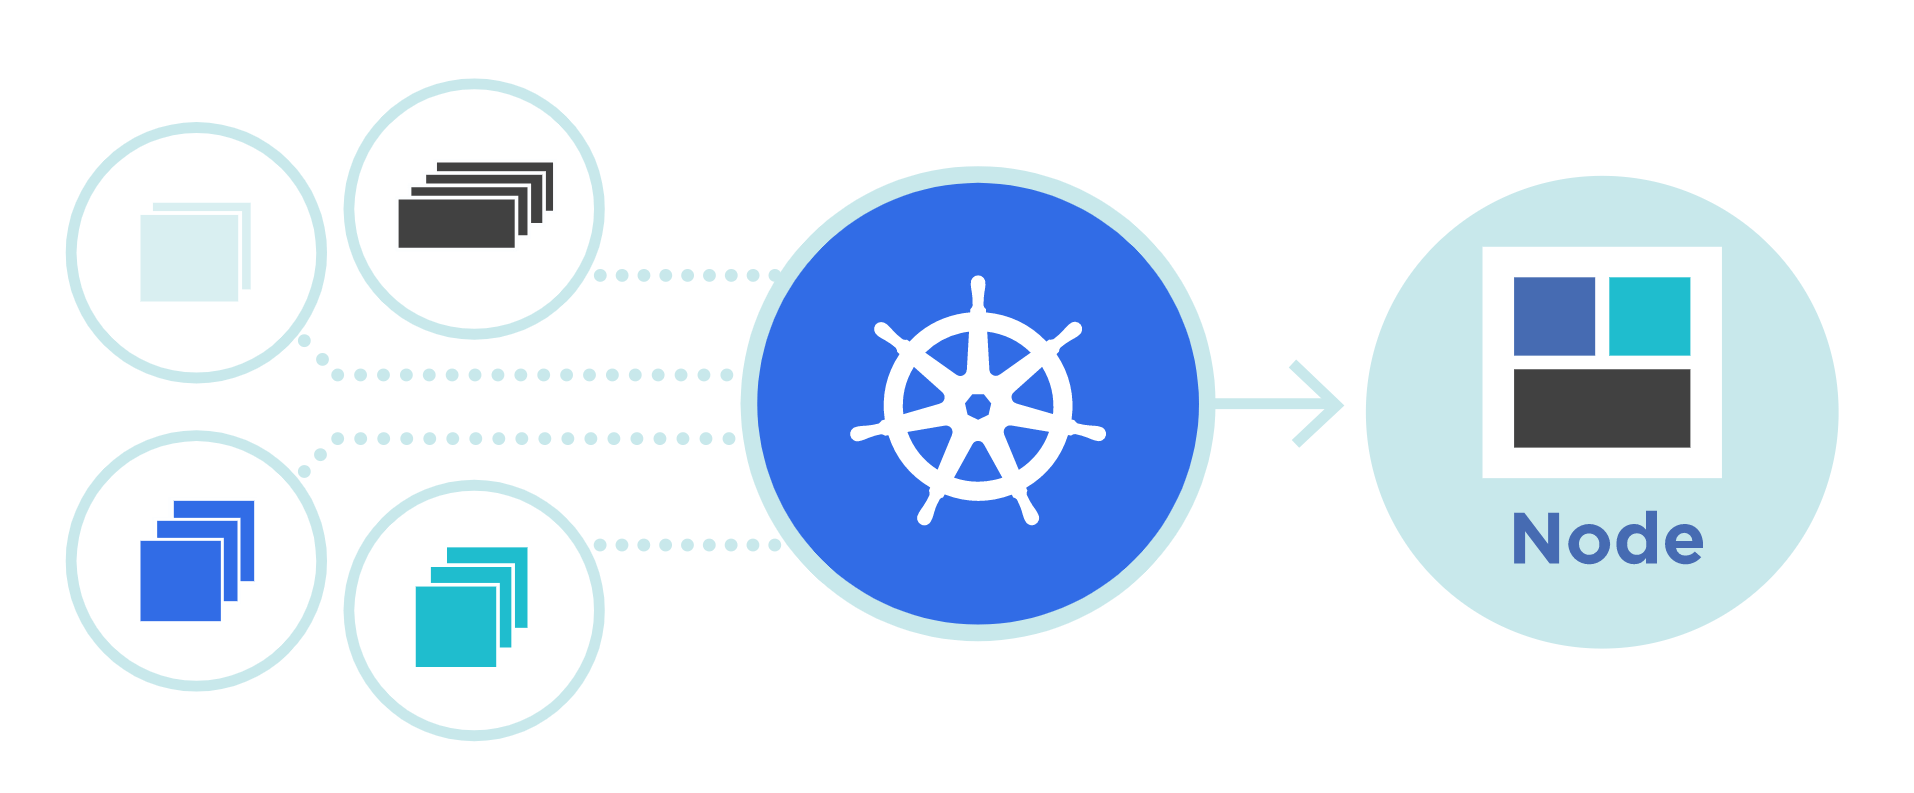
The name Kubernetes comes from Greek and means helmsman or pilot. It is the root of governor and cybernetics. K8s is an abbreviation obtained by replacing the eight letters “ubernete” with the number 8. In this blog post I will give you a small introduction to Kubernetes and walk you through the installation process.
What is Kubernetes (K8s)?

Kubernetes is an extensible and portable open-source platform for managing services and workloads. Kubernetes facilitates automation and declarative configuration, which is one of its great advantages. It has a large and very dynamically growing ecosystem – tools and services, as well as Kubernetes support, are available on hundreds of websites on the Internet.
Why should you use Kubernetes?
Kubernetes helps you control resource allocation and traffic management in your applications and microservices in the cloud. It also helps to simplify various aspects of service-oriented infrastructure. Kubernetes lets you know where and when your container applications are running, and helps you find the resources and tools you want to work with.
Essential Kubernetes features:
- Ready to scale: designed on the same principles that allow Google to run billions of containers each week, Kubernetes can scale without growing your operations team.
- Ready for any complexity: whether it’s for local testing or global enterprise workloads, the flexibility of Kubernetes grows with you to deliver your applications consistently and easily no matter the complexity.
- Ready to run anywhere: Kubernetes is open source, giving you the freedom to leverage your on-premises, hybrid, or public cloud infrastructure, allowing you to effortlessly move workloads wherever you want.
The rise of a revolution
Kubernetes was born as Google’s internal container orchestration solution and its original name was “Project Seven of Nine”. A familiar name for fans of the Star Trek series.
The Borg system – “I’m your father K8s!”
The beginning of the birth of our hero dates back to the beginning of the twenty-first century. At that time, Google started a small project involving around four people, aimed at creating a new version of a search engine. This is how Borg was born. A cluster management system capable of running thousands of jobs, from thousands of different applications, across multiple clusters, each with up to tens of thousands of machines.
For a decade Google programmers decided to undertake a long modernization task by rewriting the Borg code (originally in C++) in Go language. The system received important improvements, among which we can mention the new cluster management called Omega, which introduced great scalability for large computing clusters.
But it wasn’t until 2014 when K8s officially appeared and was introduced to the community of programmers and developers as an open-source version of the Borg system. A few months later, seeing the great potential of this technology, companies like Microsoft, IBM, RedHat, Huawei and Docker joined the K8s community. There is no doubt that the most important step that Google took was collaborating with The Linux Foundation to create The Cloud Native Computing Foundation, known as CNCF.
During the last five years, and after the debut of Minikube (a tool designed to facilitate the local management of K8s), we have witnessed a very dynamic evolution of K8s around the world. The (r)evolution that seems to have no end that day by day offers us better solutions.
What Kubernetes is not
Kubernetes operates at the container level and not at the hardware level, and the fact that it offers services very similar to Platforma as a Service, such as deployments, scaling, load balancing, logs, etc. does not strictly classify it among PaaS. K8s is not a monolith and the solutions it offers by default are optional and interchangeable.
Kubernetes Architecture
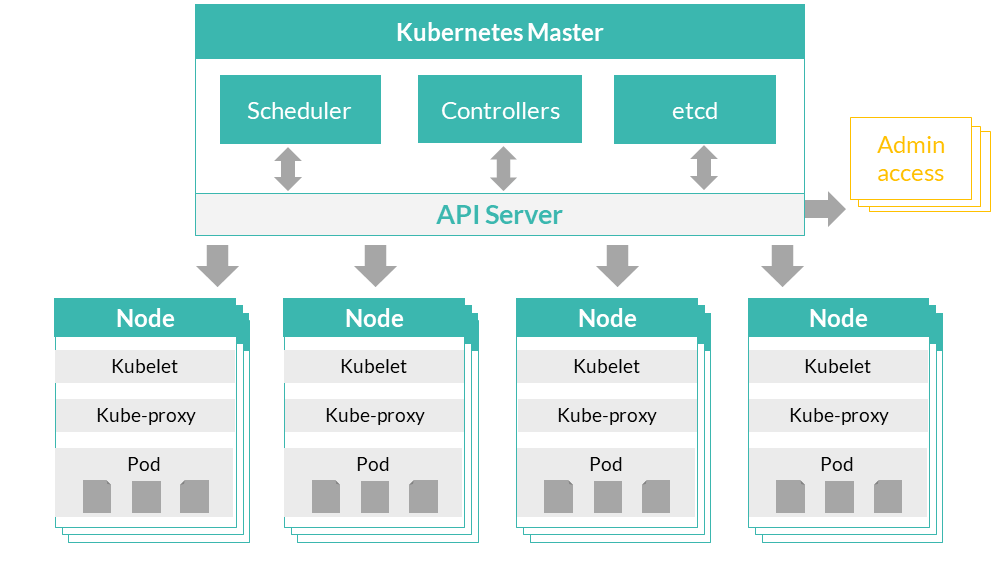
- Nodes: The nodes in Kubernetes are the machines that make up the Kubernetes cluster. These machines can be physical or virtual, and be deployed on-premise or in the cloud. In turn, the nodes can be master nodes or worker nodes.
- Master nodes: The master nodes are responsible for managing the Kubernetes cluster. These nodes make global decisions about the cluster, such as the distribution of work between the worker nodes, and detect and respond to different events in the cluster, such as the start of new pods when the number of replicas is less than that configured for a controller replication. In a Kubernetes cluster there can be a single master node or several if we want to have redundancy to ensure greater availability of the cluster. If there are multiple master nodes, the number of master nodes must always be odd so that a quorum can be established. This is because each master node runs a node from the etcd distributed database and all the remaining Kubernetes master components (API, controller manager / controller, and scheduler). An etcd cluster needs to reach a majority of nodes, a quorum, to agree on the cluster status updates, and this can only be ensured if the number of nodes is odd.What are the components of the master node?
- API server: It is the component that exposes the Kubernetes API. It is therefore the entry point for all REST commands used to control the cluster. It processes REST requests, validates and executes them.
- controller manager / controller: This component runs the drivers. A controller uses the API server to observe the shared state of the cluster and makes corrective changes to the current state to change it to the desired state.
- scheduler: This component watches for newly created pods that do not have an assigned node and selects a node for them to run. The scheduler considers the resources available on each node of the cluster, as well as the resources required for a specific service to run. With this information, you decide where to deploy each pod within the cluster.
- etcd: is a simple, distributed, and consistent key-value data store. It is used to store shared cluster configuration and for service discovery. It allows in a reliable way to notify the rest of the cluster nodes of the configuration changes in a given node.
- Worker nodes: also called simply nodes, are responsible for running applications in pods. Each worker node runs the following components:
- kubelet: is the service, within each worker node, responsible for communicating with the master node. Gets the pod configuration from the API server and ensures that the containers described in that setup are up and running properly. It also communicates with etcd to obtain information about the services and to record the details of the new services created.
- kube-proxy: acts as a network proxy and load balancer by routing traffic to the correct container based on the IP address and port number specified in each request.
- container runtime: is the software responsible for running the pod containers. To do this, it is responsible for downloading the necessary images and starting the containers. Kubernetes supports multiple container runtimes: Docker, rkt, runc, and any implementation of the Open Container Initiative (OCI) runtime specification.
- pod: is a logical collection of containers and resources shared by those containers that belong to an application.
- Master nodes: The master nodes are responsible for managing the Kubernetes cluster. These nodes make global decisions about the cluster, such as the distribution of work between the worker nodes, and detect and respond to different events in the cluster, such as the start of new pods when the number of replicas is less than that configured for a controller replication. In a Kubernetes cluster there can be a single master node or several if we want to have redundancy to ensure greater availability of the cluster. If there are multiple master nodes, the number of master nodes must always be odd so that a quorum can be established. This is because each master node runs a node from the etcd distributed database and all the remaining Kubernetes master components (API, controller manager / controller, and scheduler). An etcd cluster needs to reach a majority of nodes, a quorum, to agree on the cluster status updates, and this can only be ensured if the number of nodes is odd.What are the components of the master node?
Now better move on to practice… so much theory is boring. We can find the theory on the official Kubernetes pages.
Installation
For beginners, who are not yet experienced with multi-container deployment, Minikube is probably the best option to start. Minikube is an open-source tool that was developed to allow system administrators and developers to run a single node cluster locally and is great for learning the basics, before moving on to Kubernetes.
What do we need?
- Ubuntu 20.04.2 on VM (min. 30GB disk, 6GB ram)
- Docker basic knowledge
- Minikube install
- Kubernetes components (kubectl)
- Updating our operating system
- VirtalBox Hypervisor installation
- Minikube download
Download the minikube binary. Put the binary in /usr/local/bin directory since it is within $PATH
We confirm the version that we have installed
- Kubectl installation
Kubectl is a Kubernetes cli tool that we need to inspect and manage cluster resources, view logs and deploy applications. We can also install kubeadm, another cli tool that allows creating and managing Kubernetes clusters. But I leave this to you as an option.
Don’t forget to make the kubectl binary executable
Move the binary in to your PATH:
we check the version of kubectl
and finally…
- We launch our minikube
Virtual machine image will be downloaded (in my case I downloaded images earlier) and configured for Kubernetes single node cluster.
Wait for the setup to finish (creation of new VM for minikube) and then wait to confirm that everything works fine.
- Minikube in action!
We review the status of the cluster:
The Minikube configuration file is located at ~./minikube/machines/minikube/config.json
I recommend taking a look at it to get familiar with the yaml files. YAML is a text format used to specify data related to configuration within K8s.
Example of the cluster configuration:
Now, as a basic point, we check the nodes:
at the moment our node doesn’t have any pod:
Let’s create a basic web-hosted static pod, it’s very easy:
a) create a yaml file as mine
b) now create the pod and start it
If you wish see what is happening while the pod creation, use the following command: watch -n 1 kubectl get pod in a new window terminal
c) and voilà! our first pod created and running
d) For detailed information about the pod (if needed) we simply use:
e) for remove pod, simply use:
For the kubernetes cluster management I recommend run kubectl – help in terminal or visit https://kubernetes.io/docs/reference/kubectl/overview/
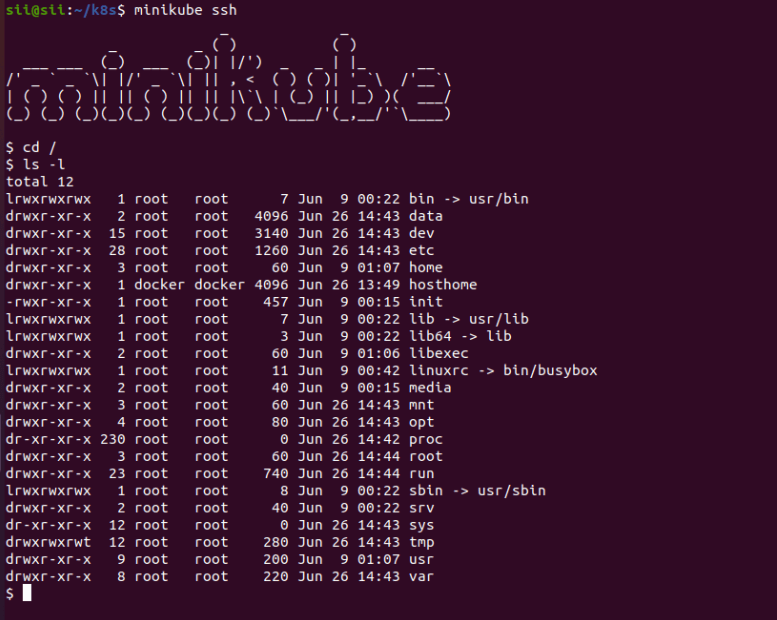
- To access our minikube node cluster, we use the SSH protocol. it’s as easy as that!
Conclusion
Today everything is aimed at being containerized, I mean the fact of packaging a software application to be distributed and executed through the use of these software containers.
I understand that not everyone knows the term, but if you work in the world of software development, you should start to learn more about it, as it has been a real revolution in the software industry in recent years. Thanks to containerization, developers have been able to become independent from the sysadmins and adopted the concept of DevOps more openly and easier to understand. Now the code creation and its distribution are comfortable.


Leave a comment